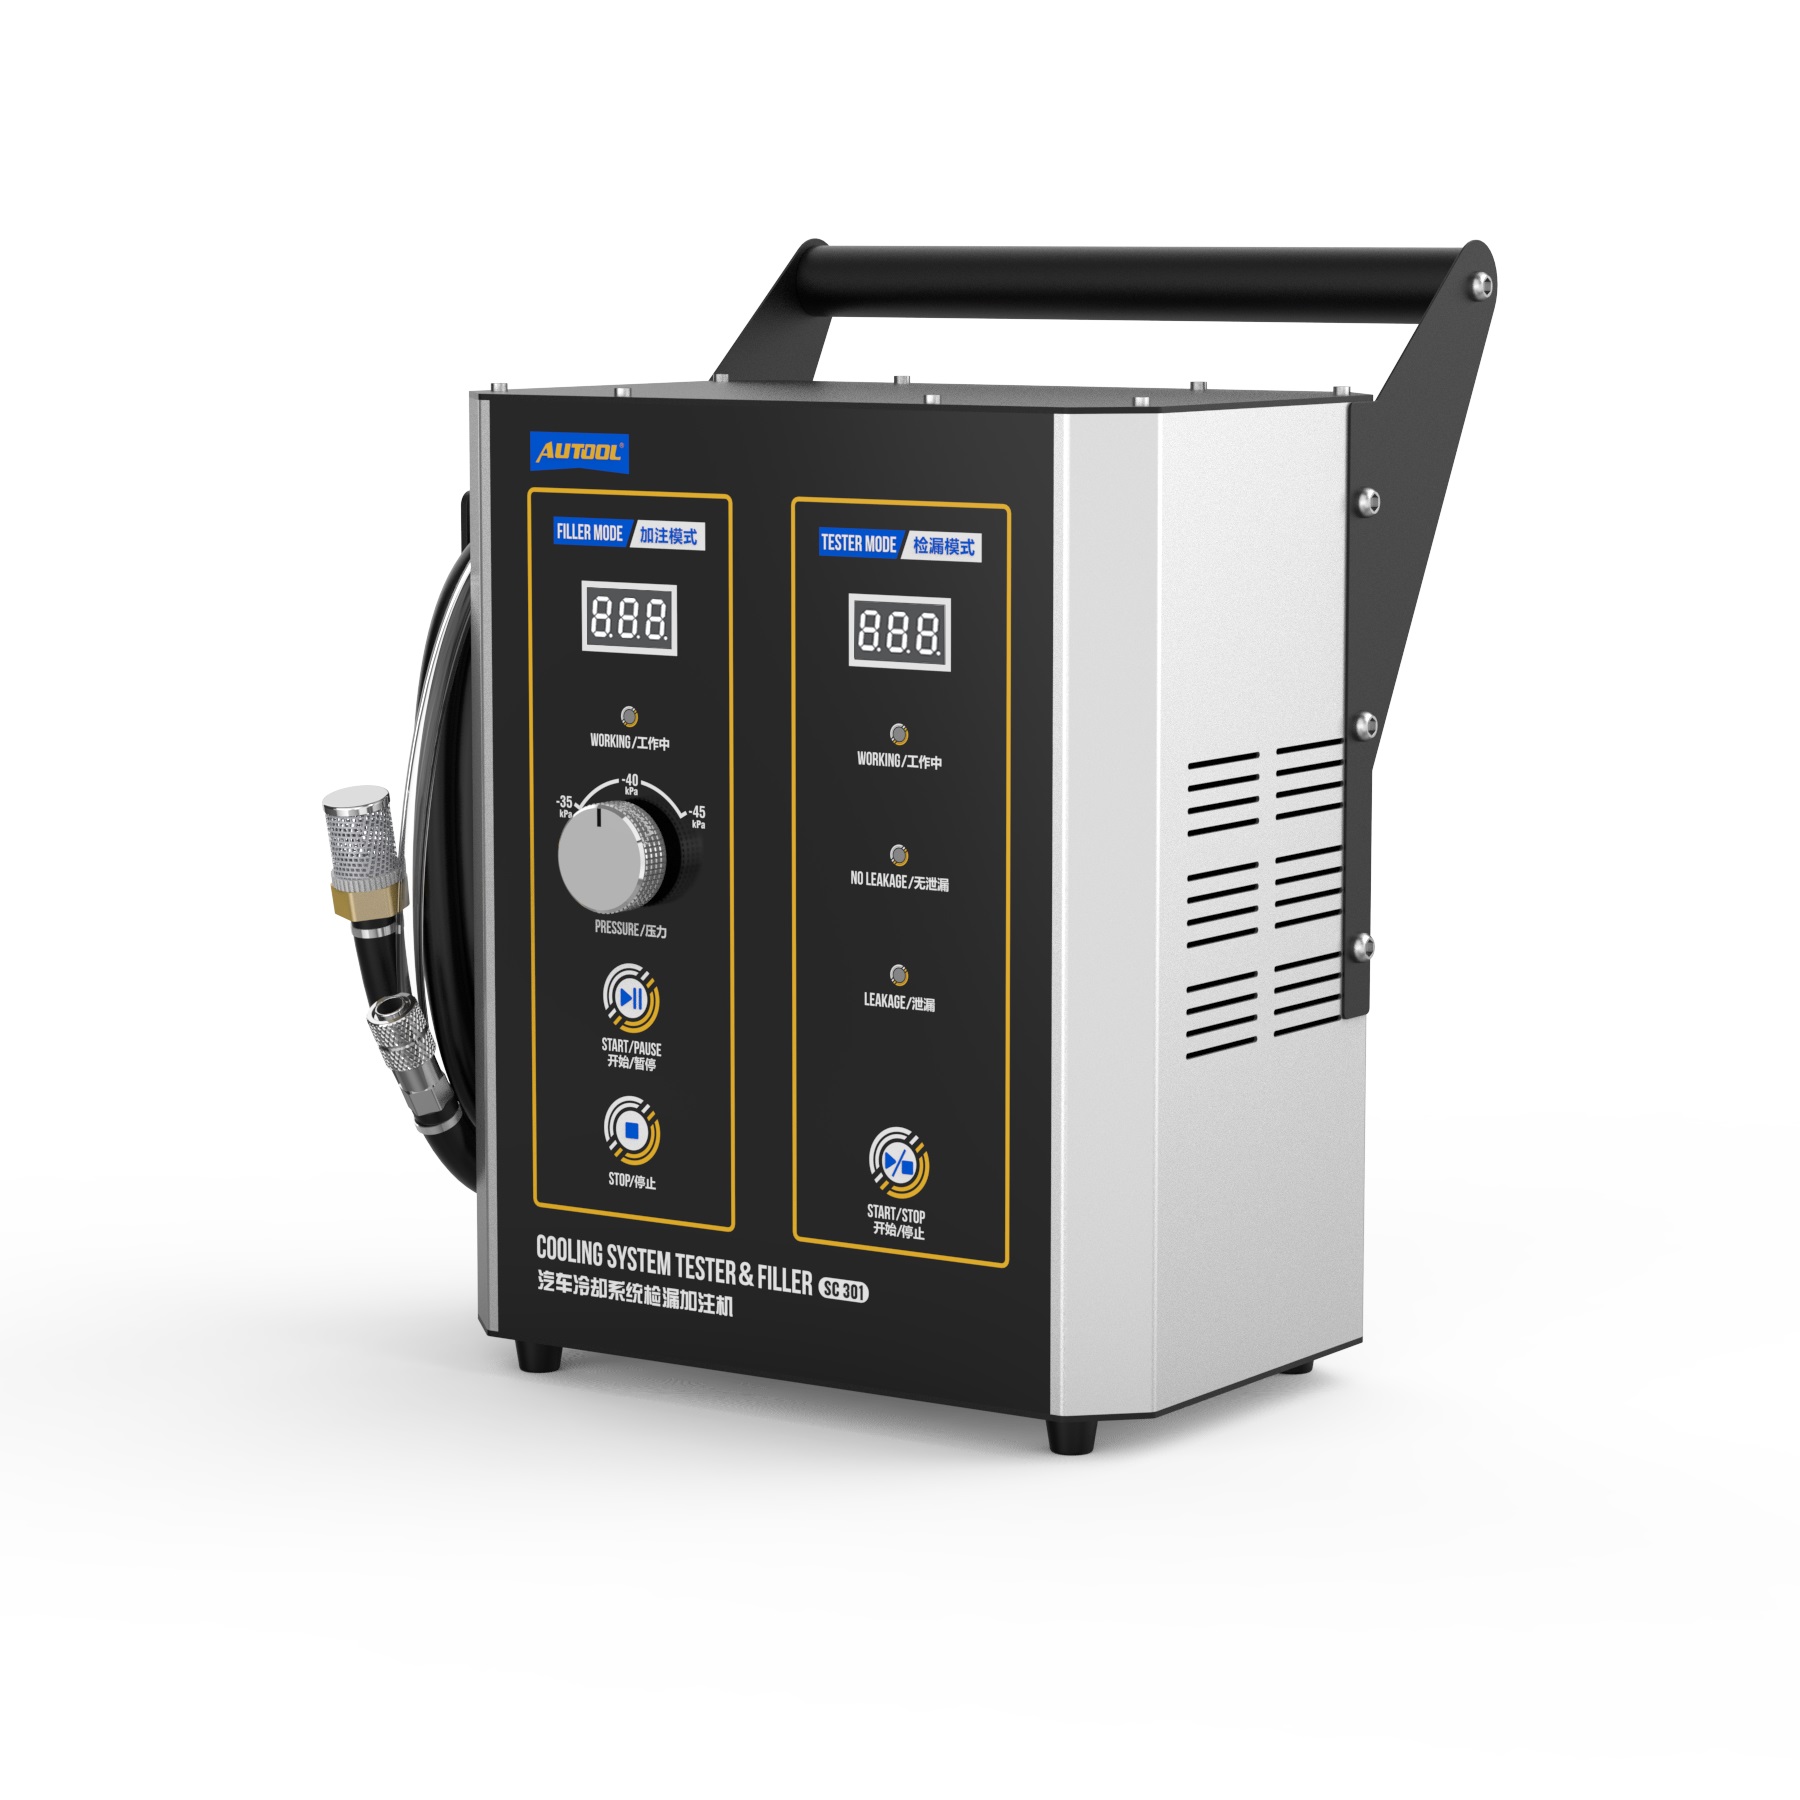


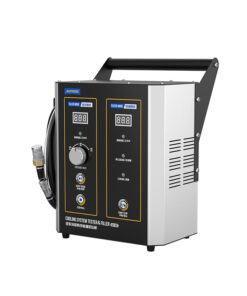


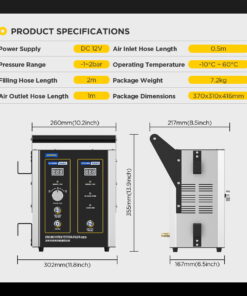


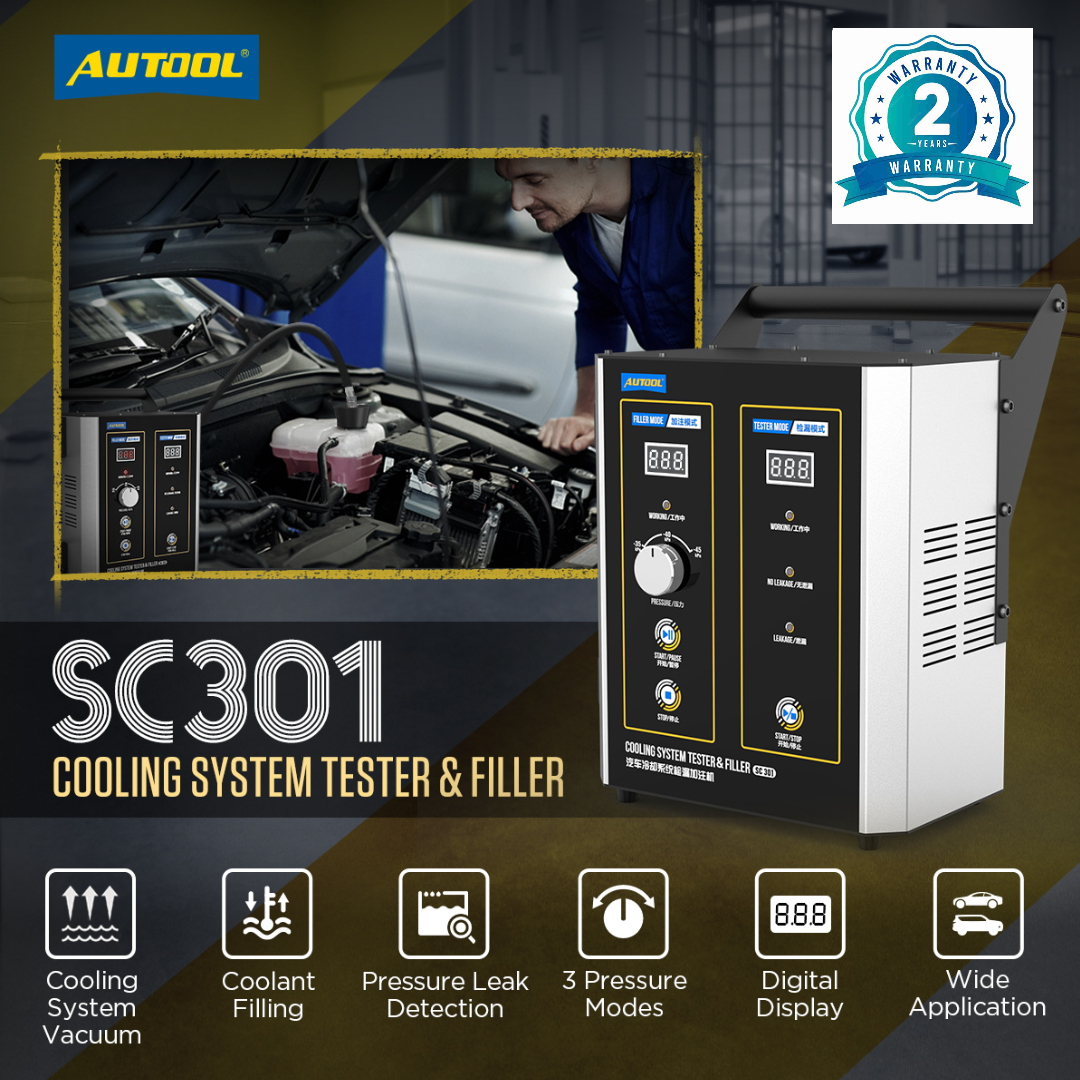
AUTOOL SC301 Automotive Coolant Leak Detector and Filler is an innovative tool designed for automotive cooling systems, skillfully combining leak detection and coolant refilling capabilities.
AUTOOL SC301 coolant leak detector operates on a dual mechanism of vacuum extraction and pressure holding to identify leaks and execute coolant filling efficiently. The entire machine features high automation, convenient operation by a single person, and time-saving, and labor-saving advantages. It can effectively help users understand the status of the cooling system and provide corresponding maintenance solutions.
AUTOOL SC301 Automotive Coolant Leak Detector and Filler Features
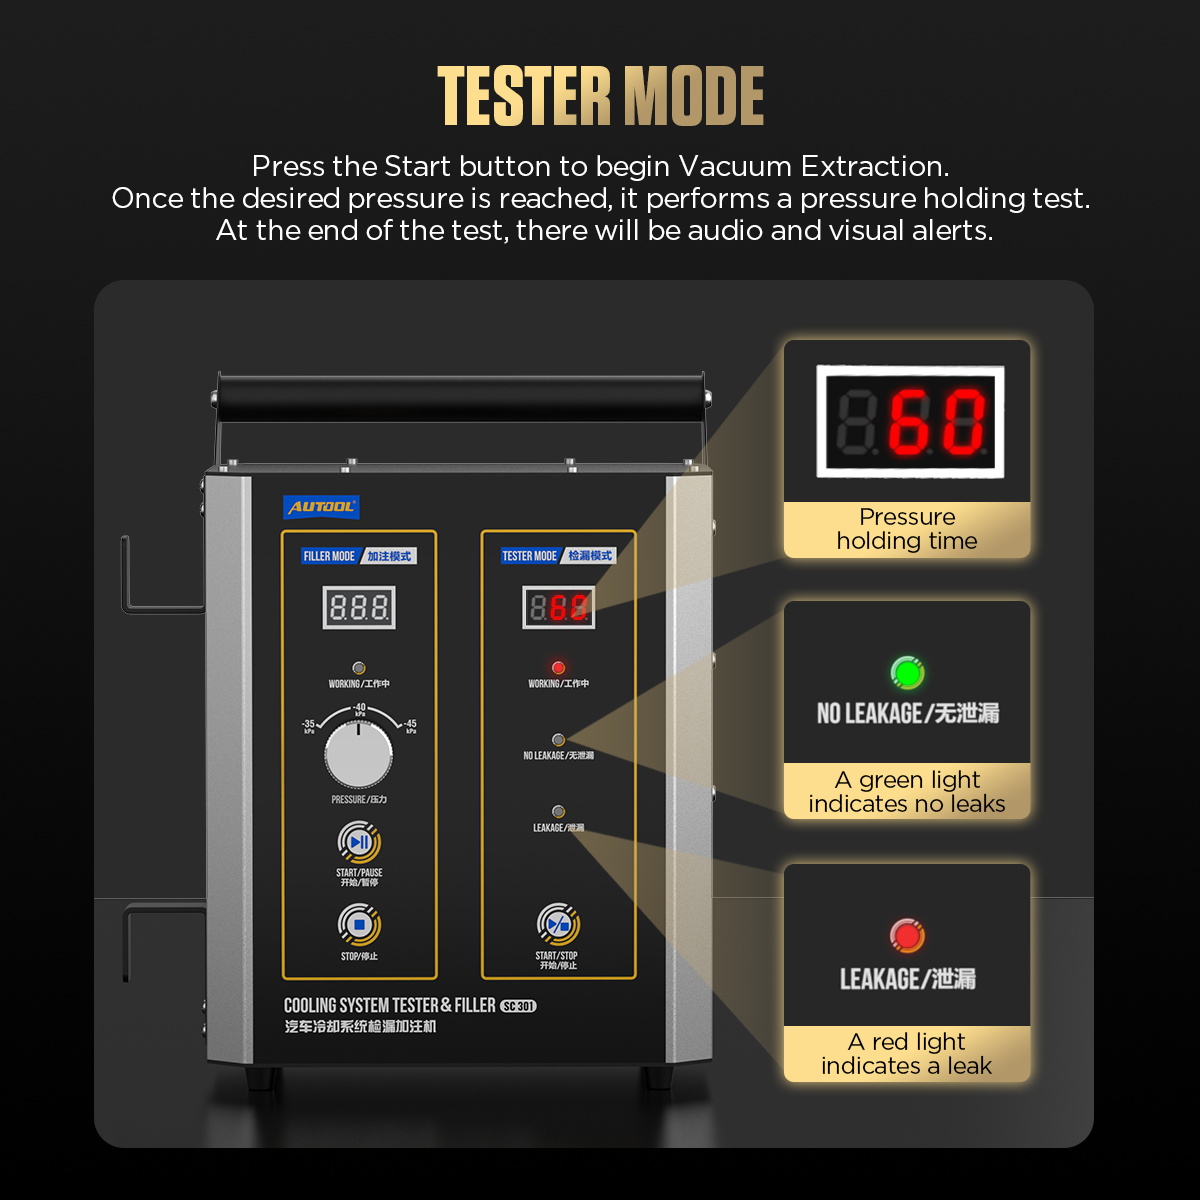
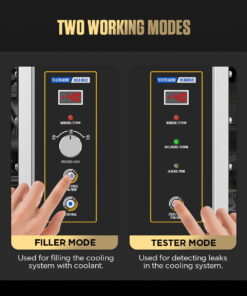
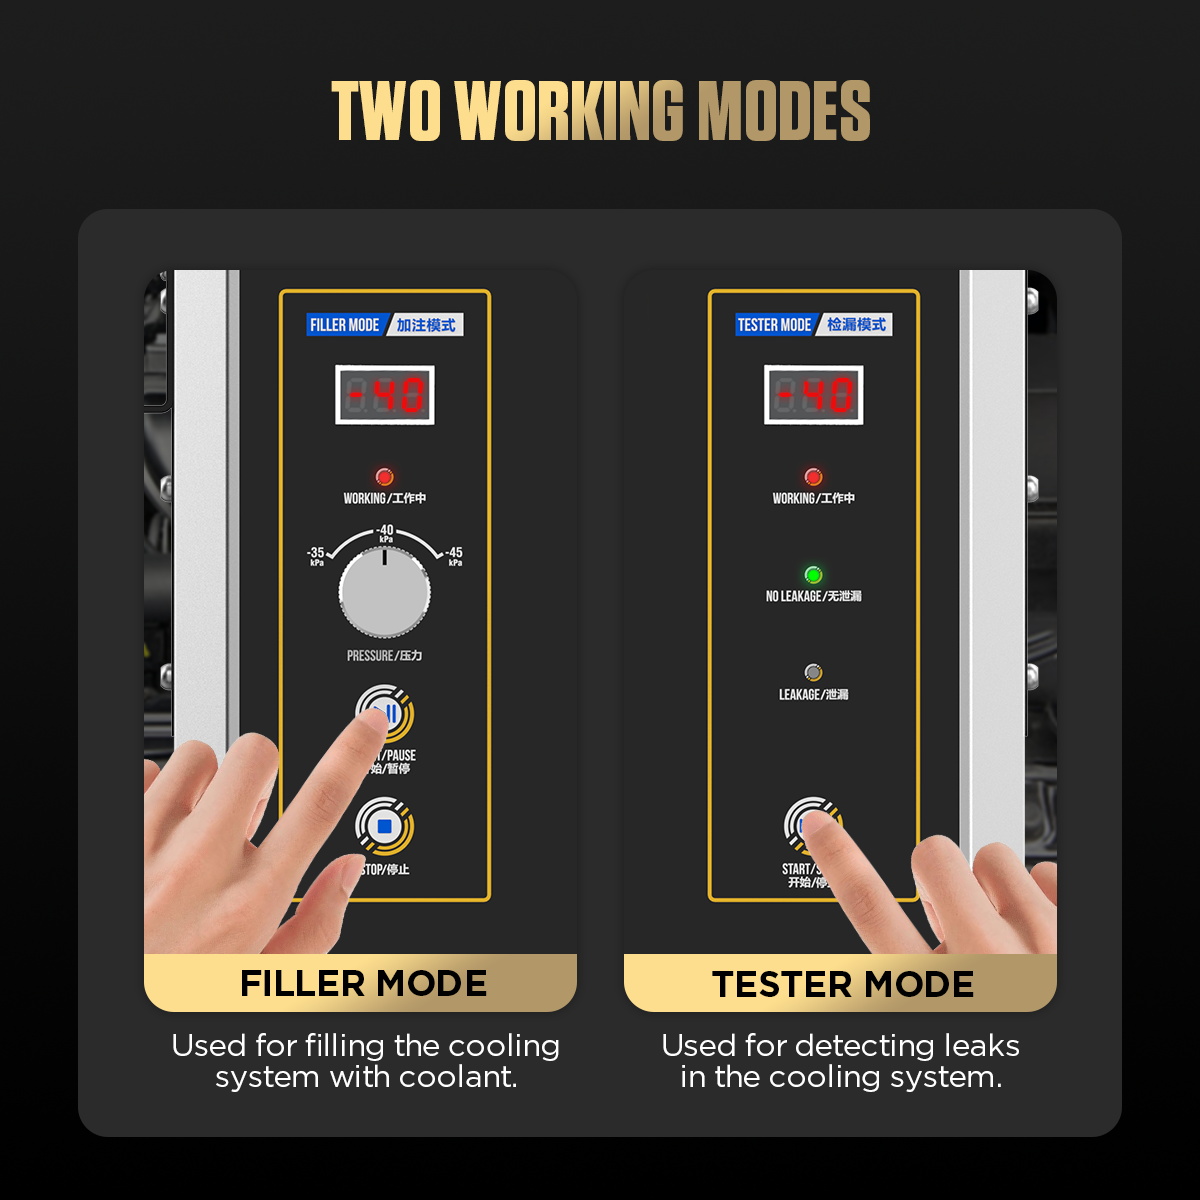
- Two Operation Modes: To meet different maintenance needs, the SC301 offers two distinct modes: 1. Filler Mode: AUTOOL SC301 coolant vacuum filler Ensures fast and efficient coolant filling without air pockets. 2. Leak Detection Mode: AUTOOL SC301 coolant pressure test function provides accurate detection of leaks in the cooling system, preventing potential failures and costly repairs.
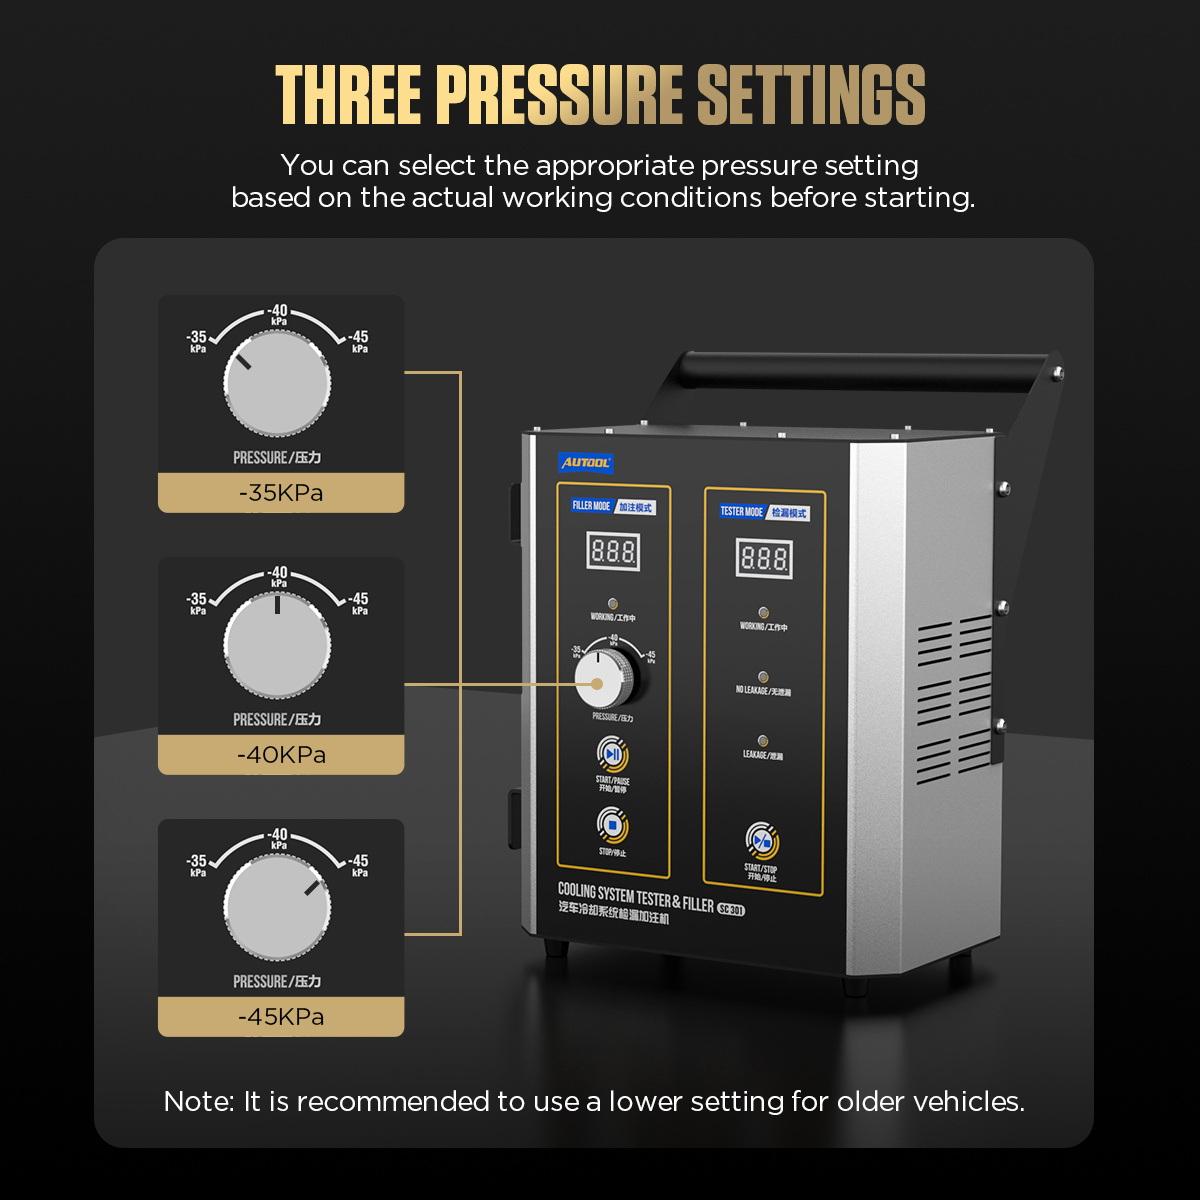
- Three pressure Settings: Users can select the most suitable pressure level based on working conditions before starting the operation. For older vehicles, a lower pressure setting is recommended to ensure safety and effectiveness. The SC301 provides three pressure options: -35KPa, -40KPa and -45KPa. This flexibility allows for precise adjustments, ensuring optimal performance across various vehicle types.
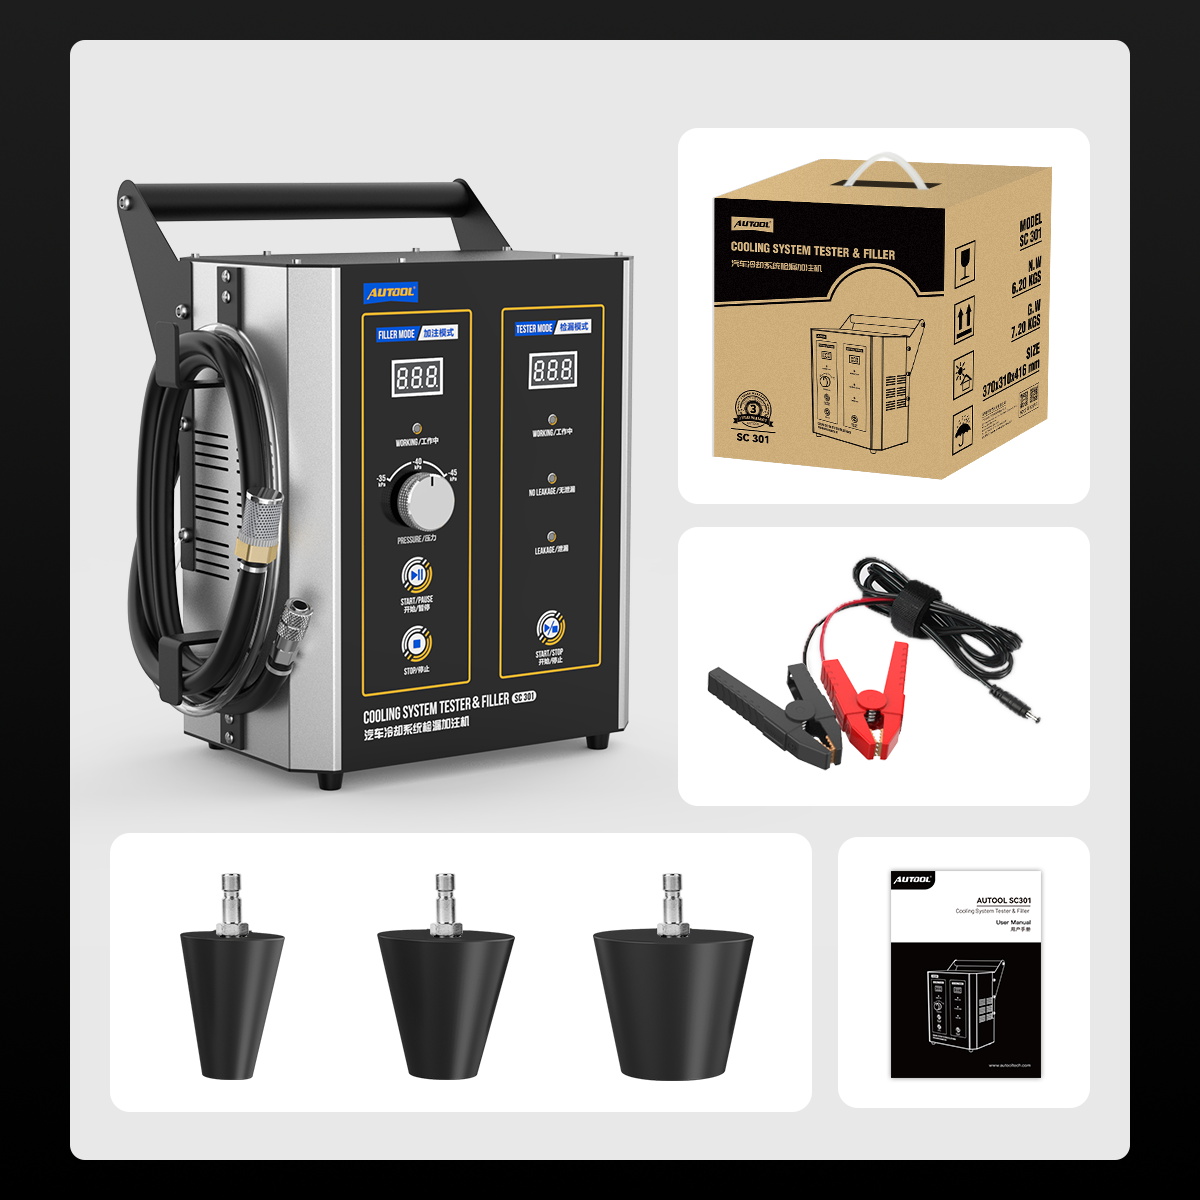
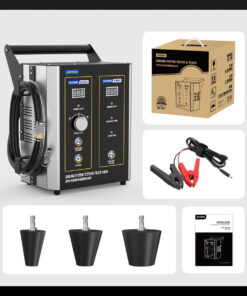
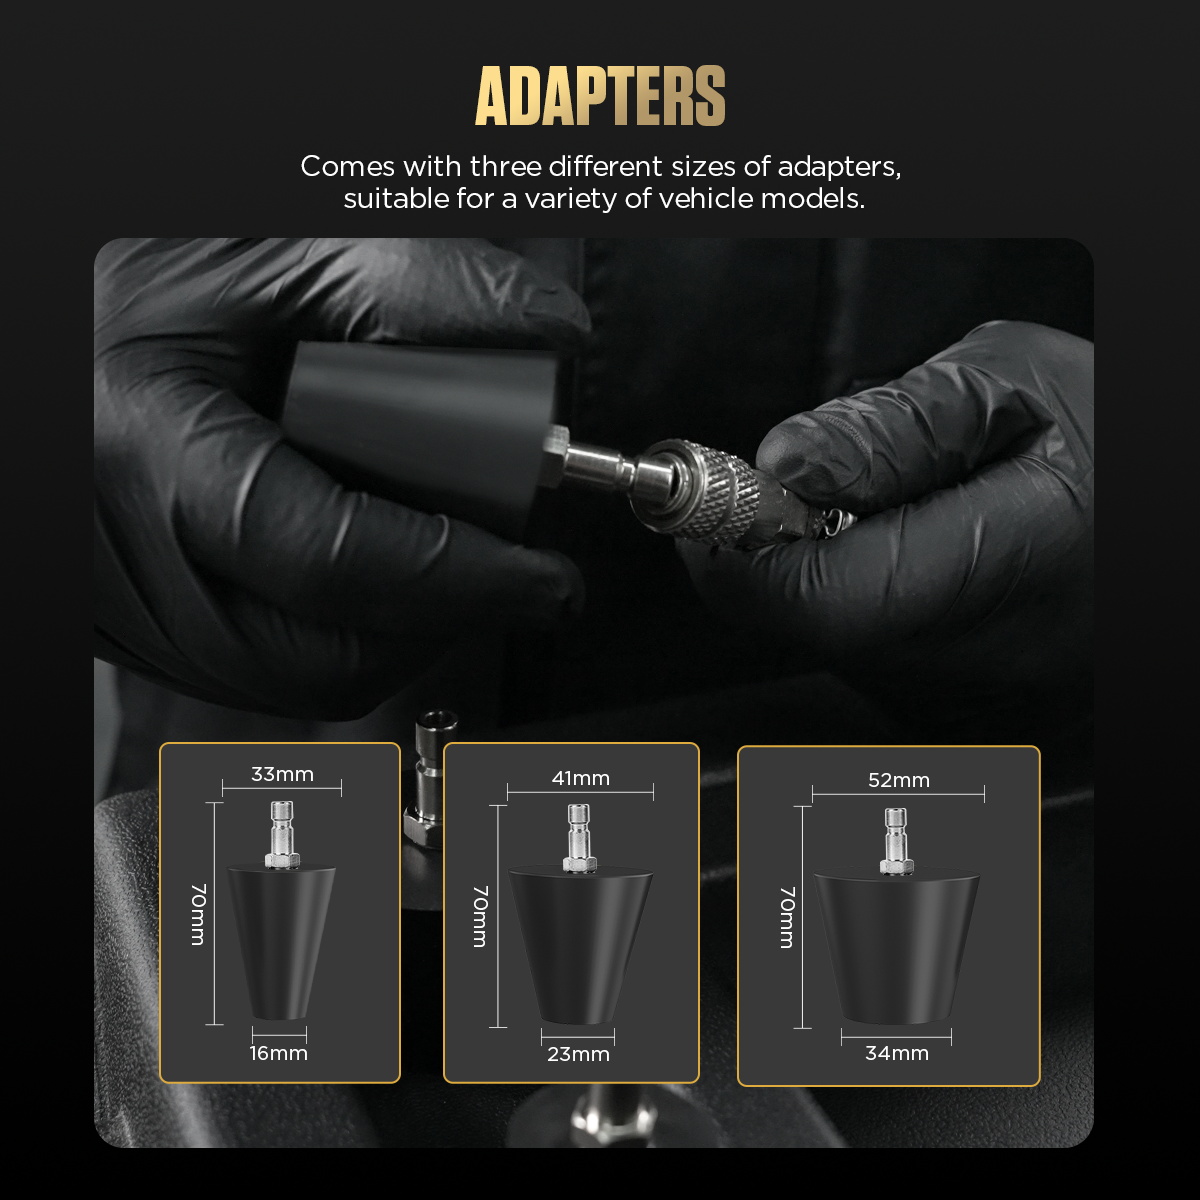
- Wide Compatibility: The SC301 coolant leak detector comes with three types of adapters, making it compatible with a wide range of vehicle models. This universal design enhances usability and convenience, eliminating the need for additional accessories.
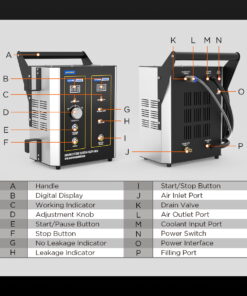
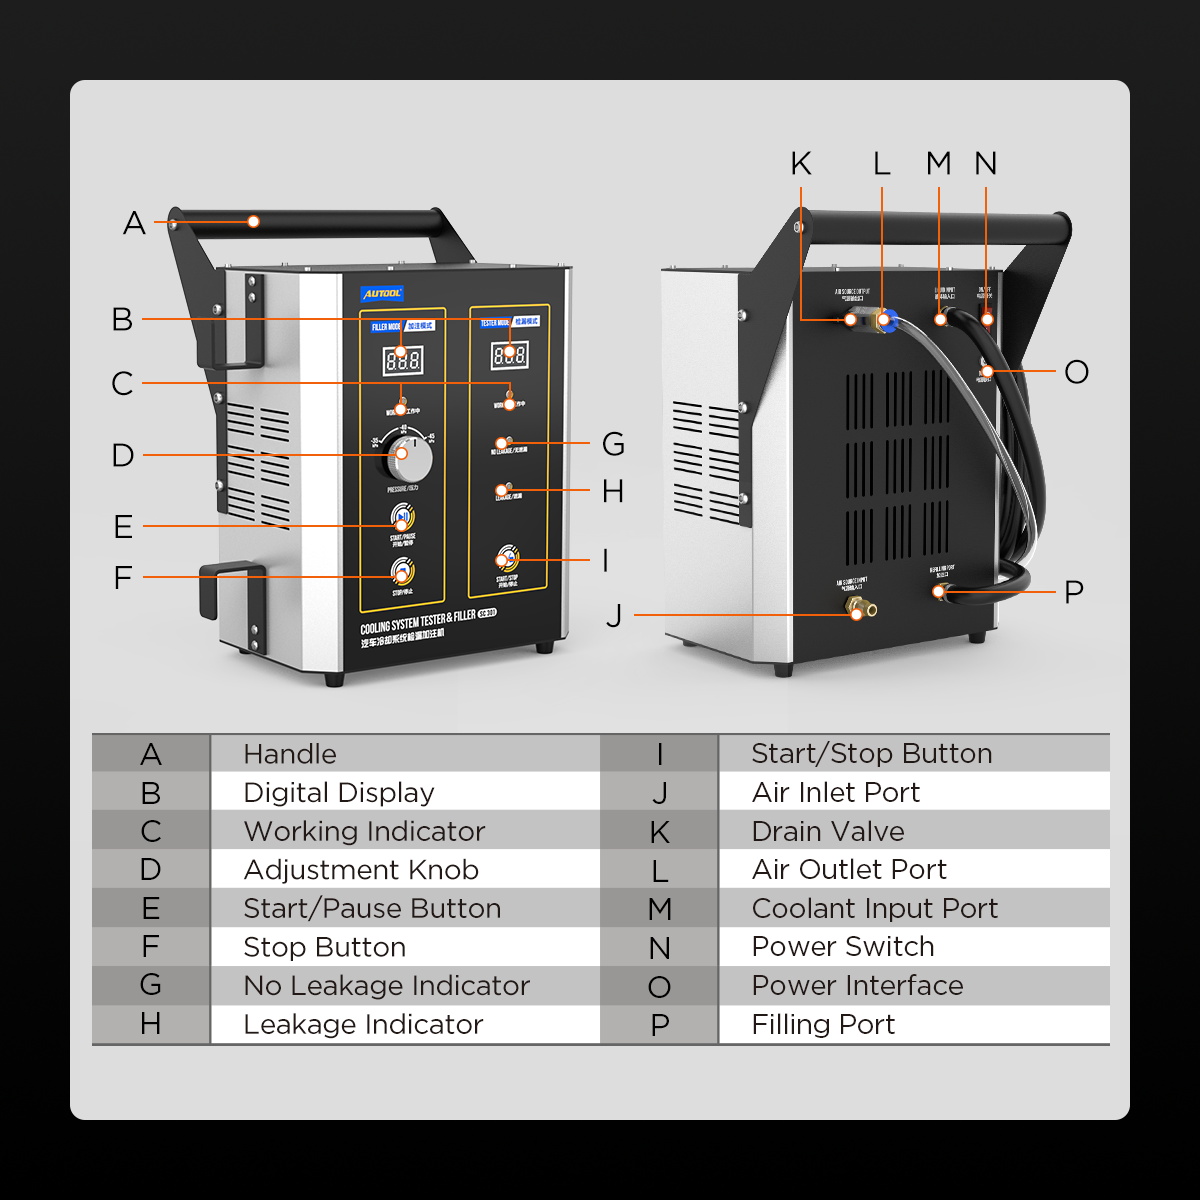
- High automation: With an intuitive digital display, users can easily monitor real-time data, streamlining the testing process. The simple and automated operation allows users to activate Filler Mode or Tester Mode with just a few steps. This advanced automation reduces manual effort, significantly improving efficiency compared to traditional methods.
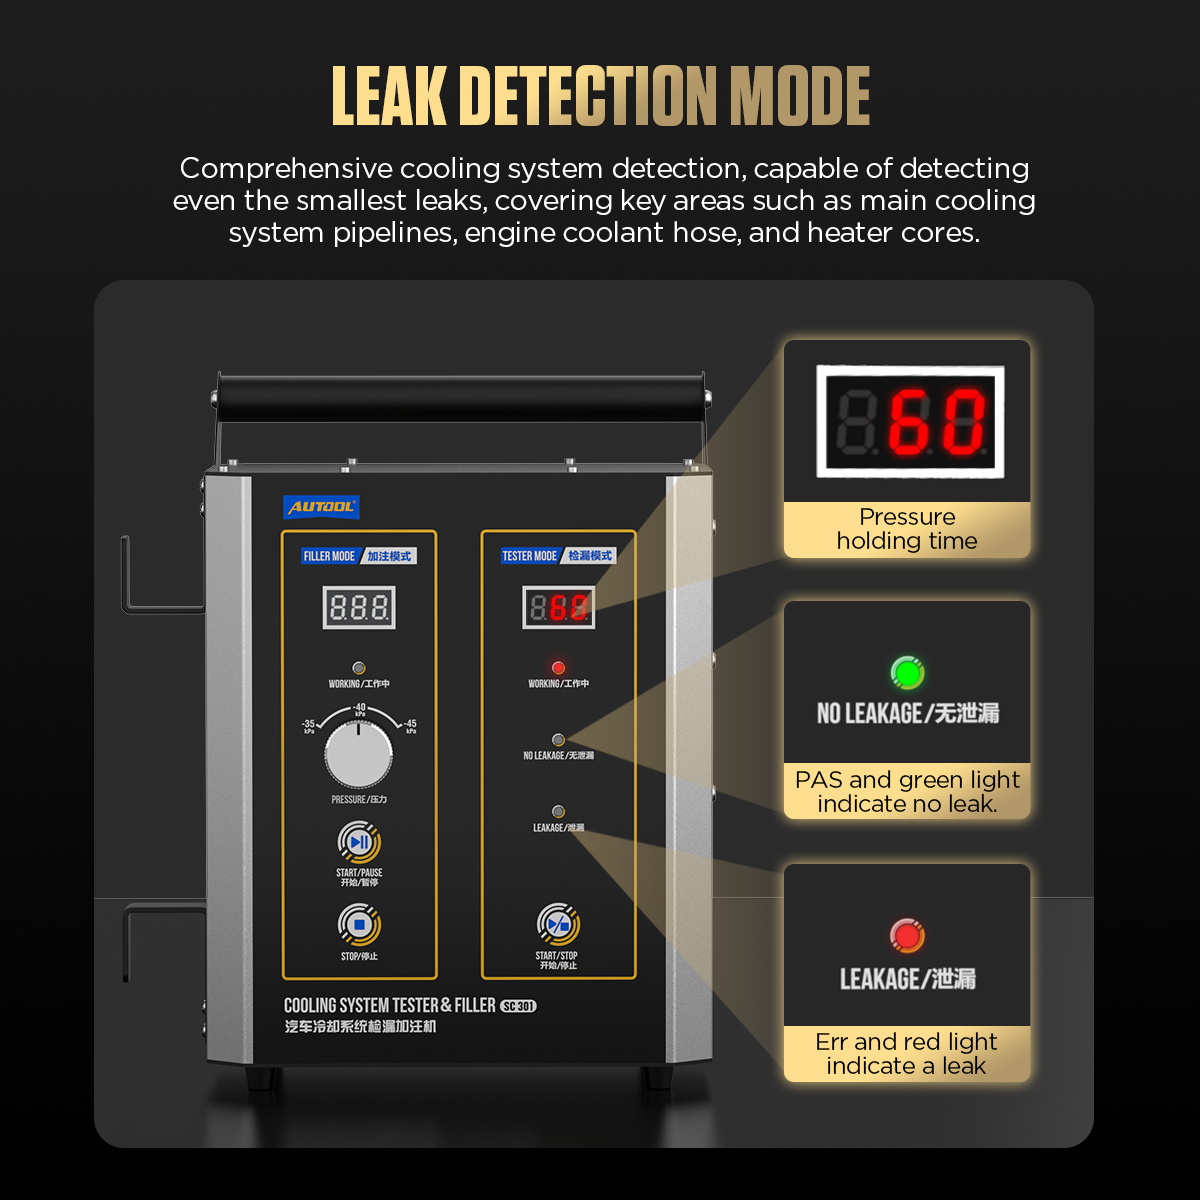
- Indicator design: The SC301 cooling system tester features two LED indicators: the red light stays on to indicate leakage, while the green light stays on when there is no leakage. Users can quickly identify cooling system issues using the leakage indicator, improving efficiency in the leakage detection process.
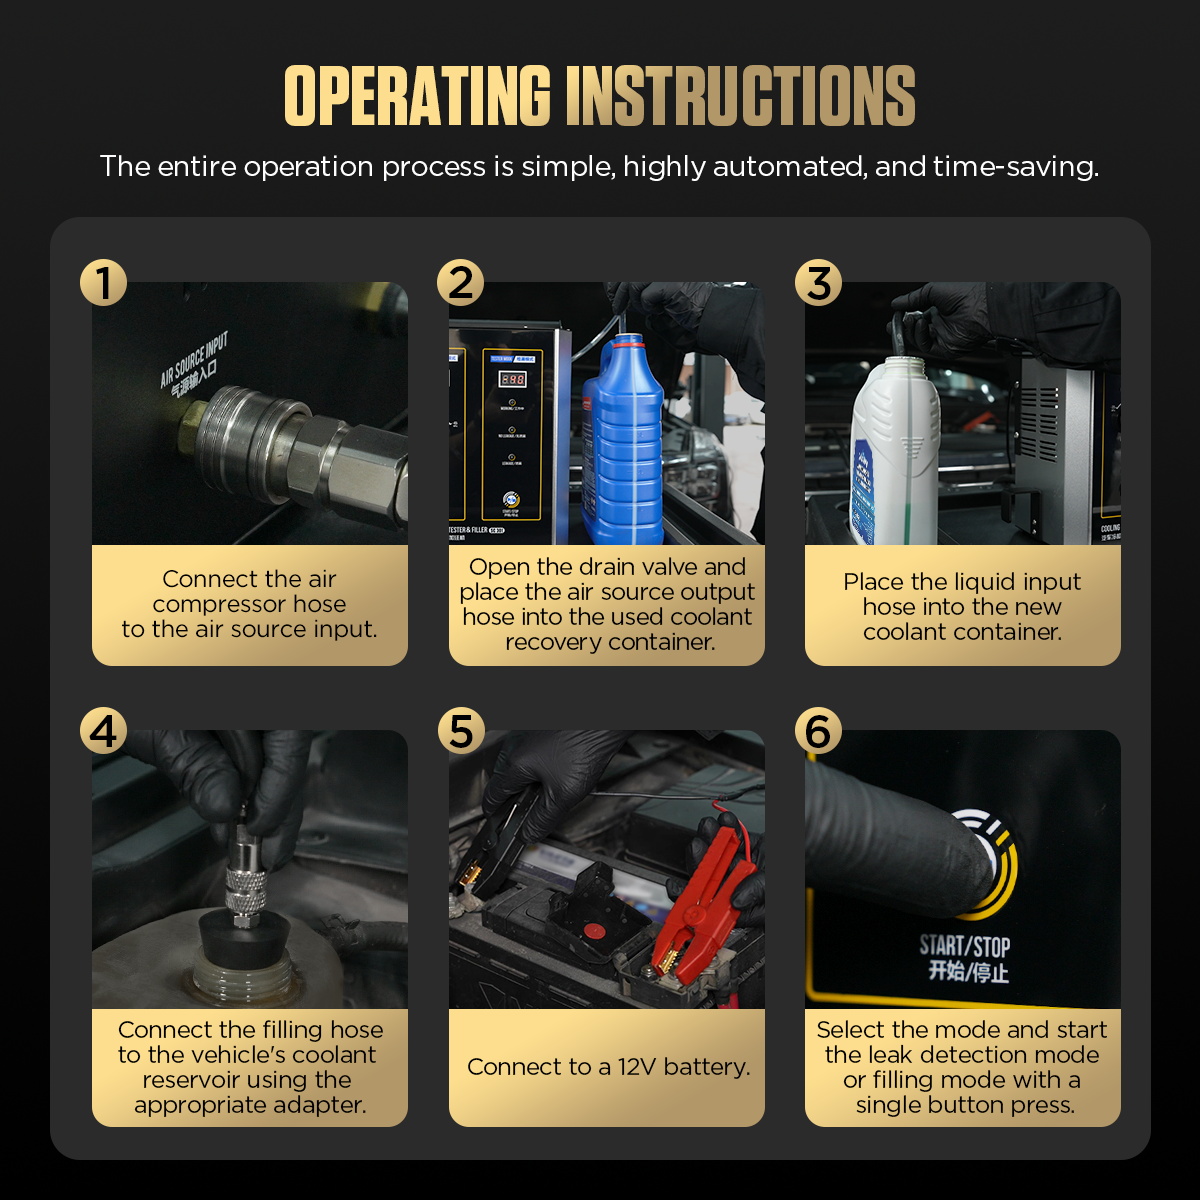
Operating Instructions
Part 1: Basic Operation
- There are three pressure settings based on vacuum pressure levels: -35KPa, -40KPa, and -45KPa.
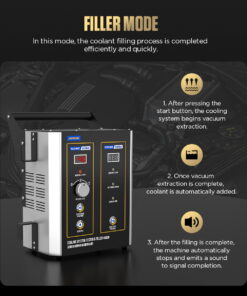
- In Filling Mode, you can choose the appropriate gear for vacuum pumping. After the vacuum pumping is complete, the system will automatically proceed to coolant filling. If it doesn’t fill, you can perform multiple filling cycles.
- In Testing Mode, if the system cannot achieve and maintain the selected vacuum level, it will switch to pressure-holding mode within two minutes and display a fault reminder.
Part 2: Testing Mode
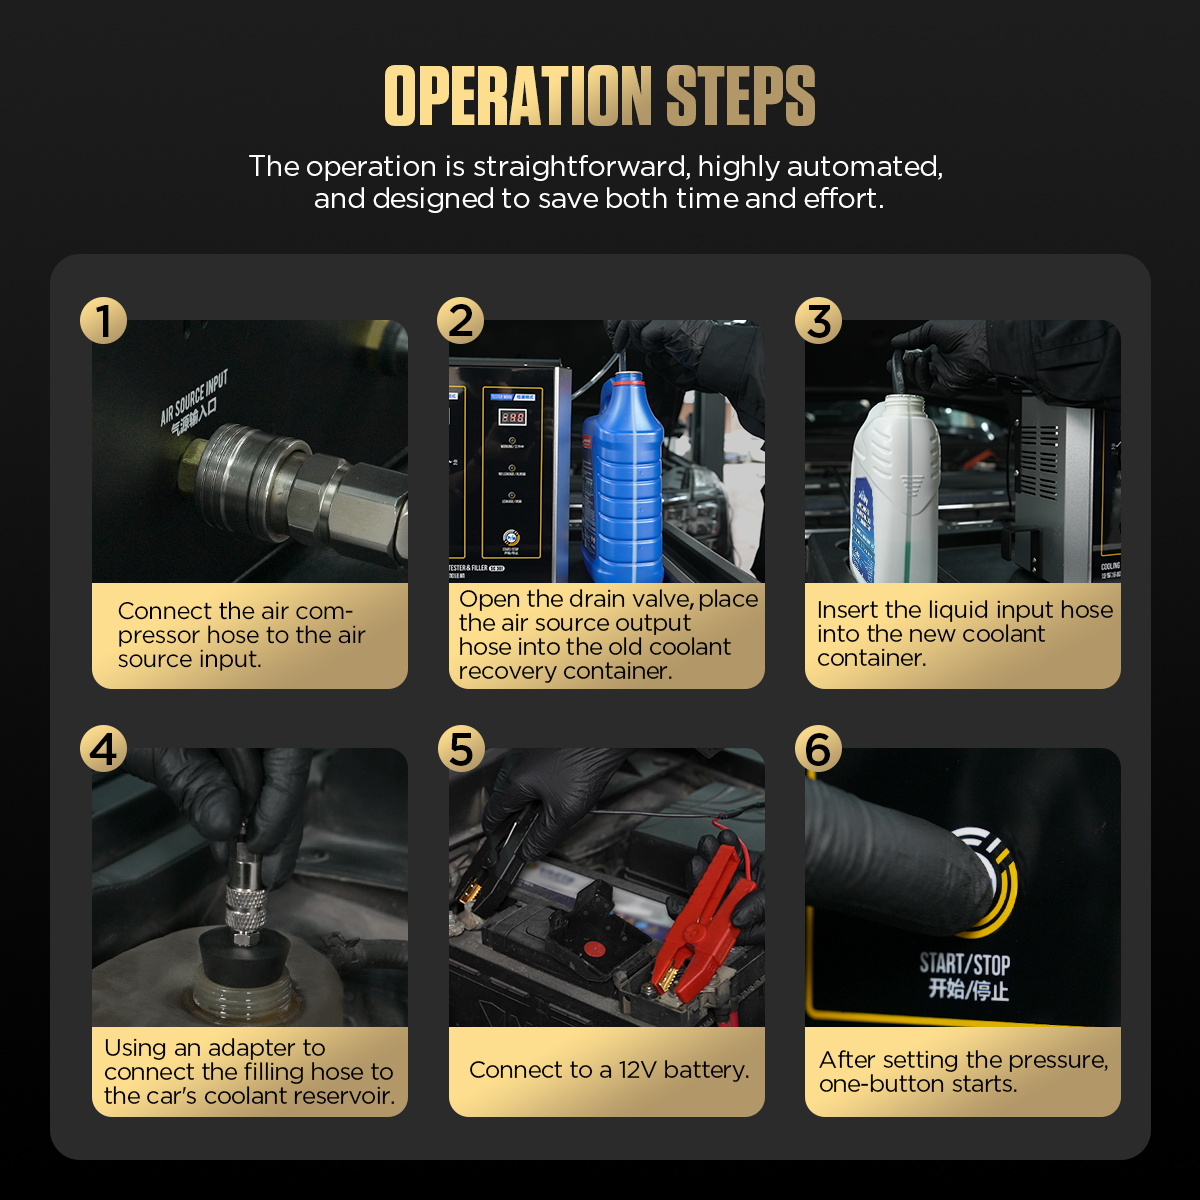
- Note: Vehicle ignition is not required. Begin by opening the drain valve before starting the operation. (The vent valve is considered open when it aligns parallel to the air hose.)
- Connect to a car battery or a 12V DC power supply and plug it into the machine’s rear power interface.
- Toggle the switch to power on the machine. There will be a buzzer sound to indicate that the machine is starting.
- Connect the air inlet hose to the air compressor.
- Select the desired gear level based on vacuum pressure: -35KPa, -40KPa, or -45KPa.
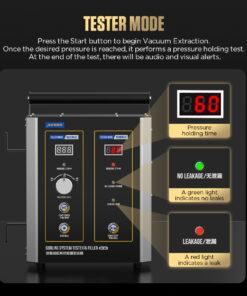
- Press the [Start/Stop] button to initiate machine operation. The machine will begin the vacuuming process. Wait for the vacuuming to complete, and the machine will automatically enter pressure-holding mode for 60 seconds. Afterward, it will provide an automatic leak detection indication.
- The leak testing function utilizes LED lights to inform the user about the coolant tank’s condition. When there is a leak, the red LED light remains continuously lit, while in the absence of a leak, the green LED light remains continuously lit.
Part3: Filling Mode
- Note: Begin by opening the drain valve before starting the operation. (The vent valve is open when it aligns parallel to the air hose.)
- After completing the Testing Mode, select the Filling Mode to add coolant to the vehicle’s cooling system.
- Connect the filling hose to the vehicle and place the coolant inlet hose into the coolant container.
- Choose the appropriate gear level (for older vehicles, it’s advisable not to use the higher gear levels).
- Press the [Start/Pause] button to initiate the vacuuming process. Once vacuuming is complete, the machine will automatically start adding coolant to the system.
- After the filling is completed, press the [Stop] button.
- After refilling, disconnect the connector from the vehicle.
Part 4: Drain Operation
- Note: When draining the residual coolant, it is recommended to drain in an open area or use a container to collect the liquid.
- After disconnecting the connector from the vehicle, close the drain valve by turning it downward. Press and hold the Tester Mode Start button until you hear the buzzer, then release. Press the Tester Mode Start button to clean the internal pipes; liquid will discharge from the filling port. When no liquid is coming out, press the Tester Mode stop button to finish draining. Turn off the power and remove the compressed air hose.


Be the first to review “AUTOOL SC301 Automotive Coolant Leak Detector and Filler”
Related products

Out of stock
Car Maintenance Tools
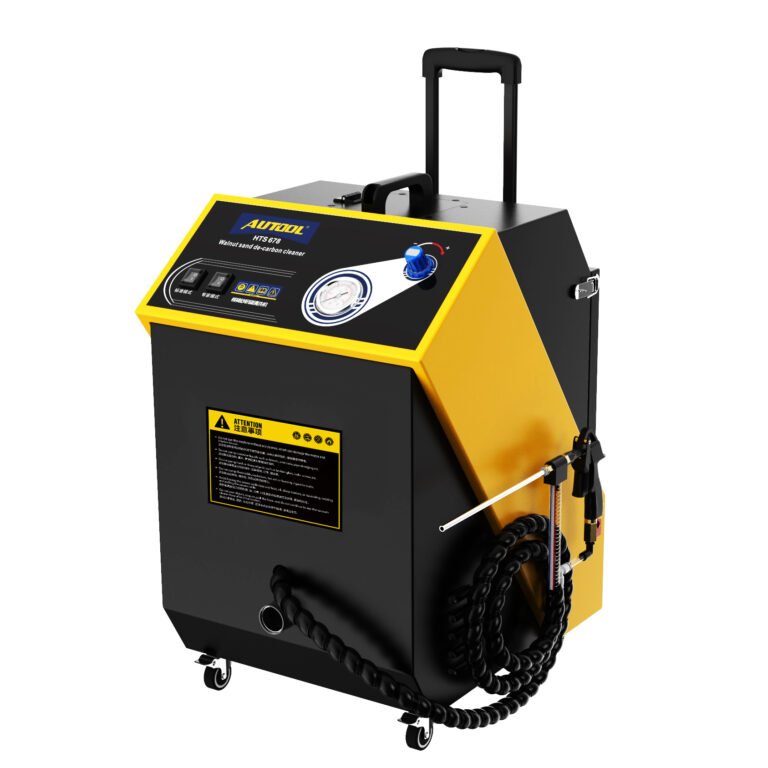
AUTOOL HTS678 Walnut Sand Blaster Cleaner Car Engine Carbon Deposition Cleannin
₹64,900.00

Car Maintenance Tools
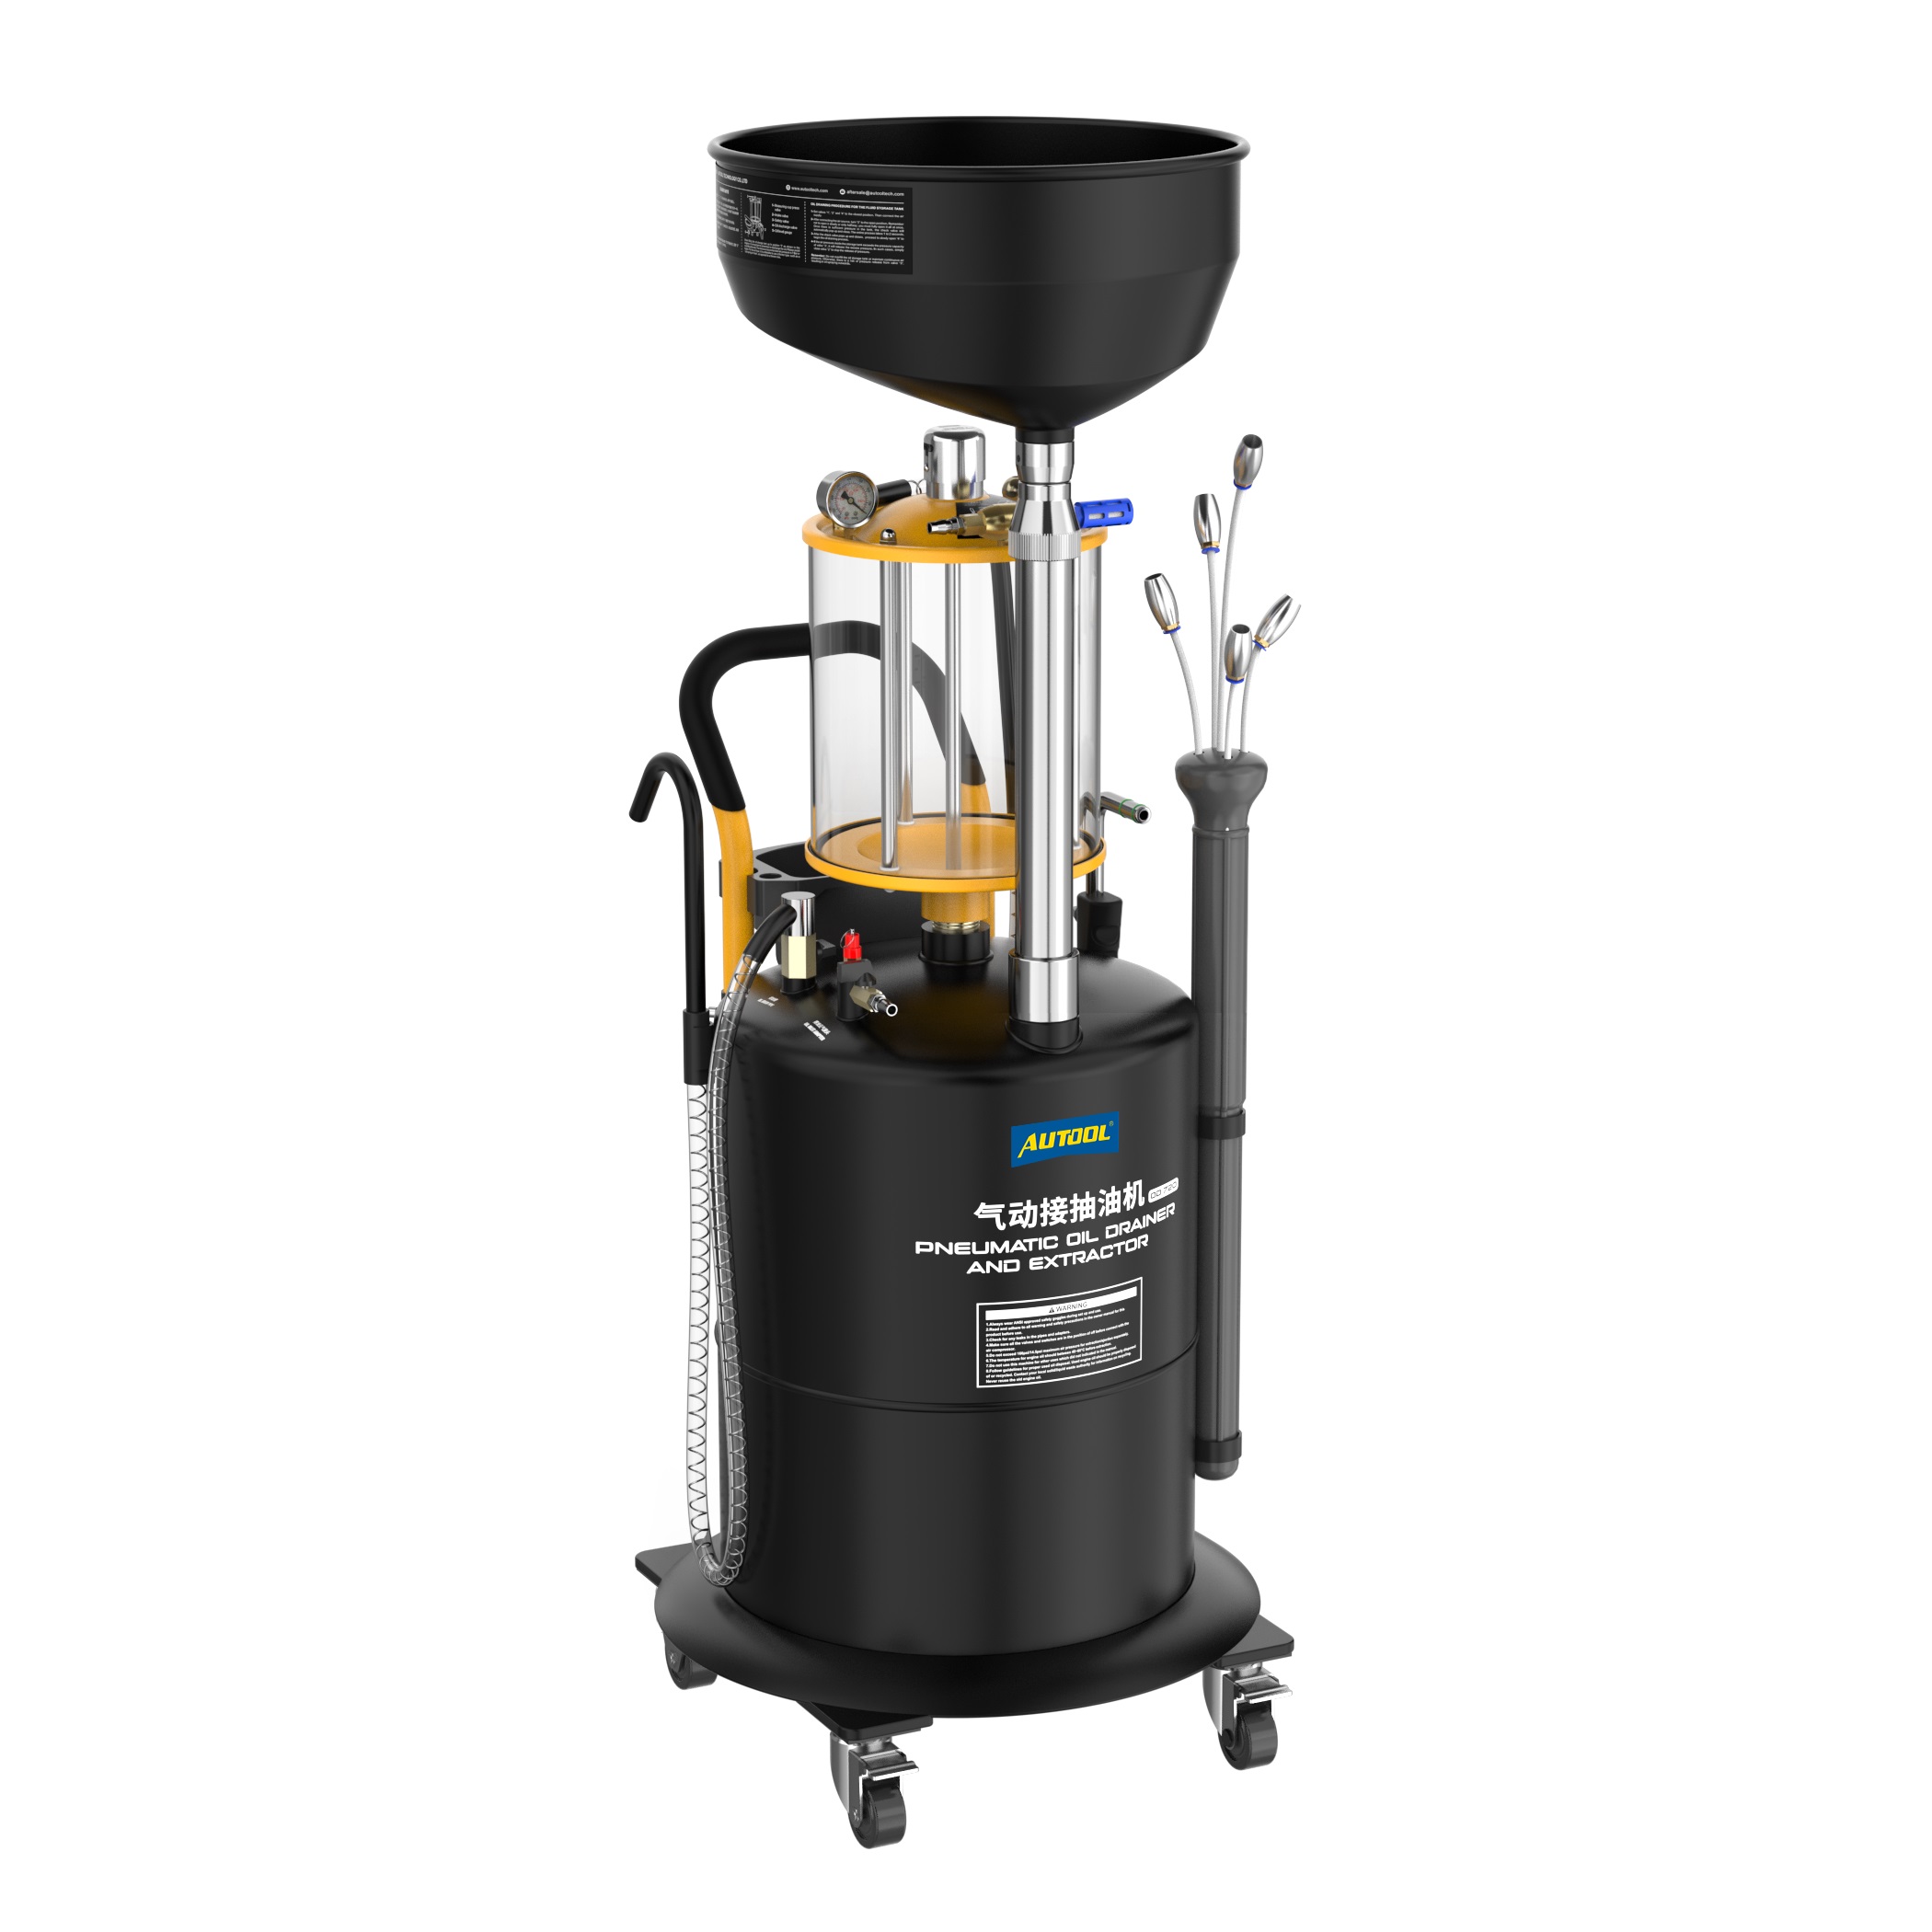
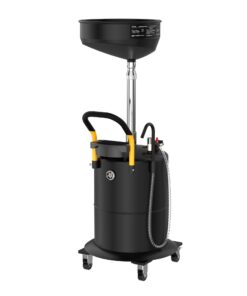
Universal Autool 15L Big Tank Manual Pump Engine Oil Suction Drainer Extractor Bleeder
₹12,000.00


Brake Fluid Exchanger
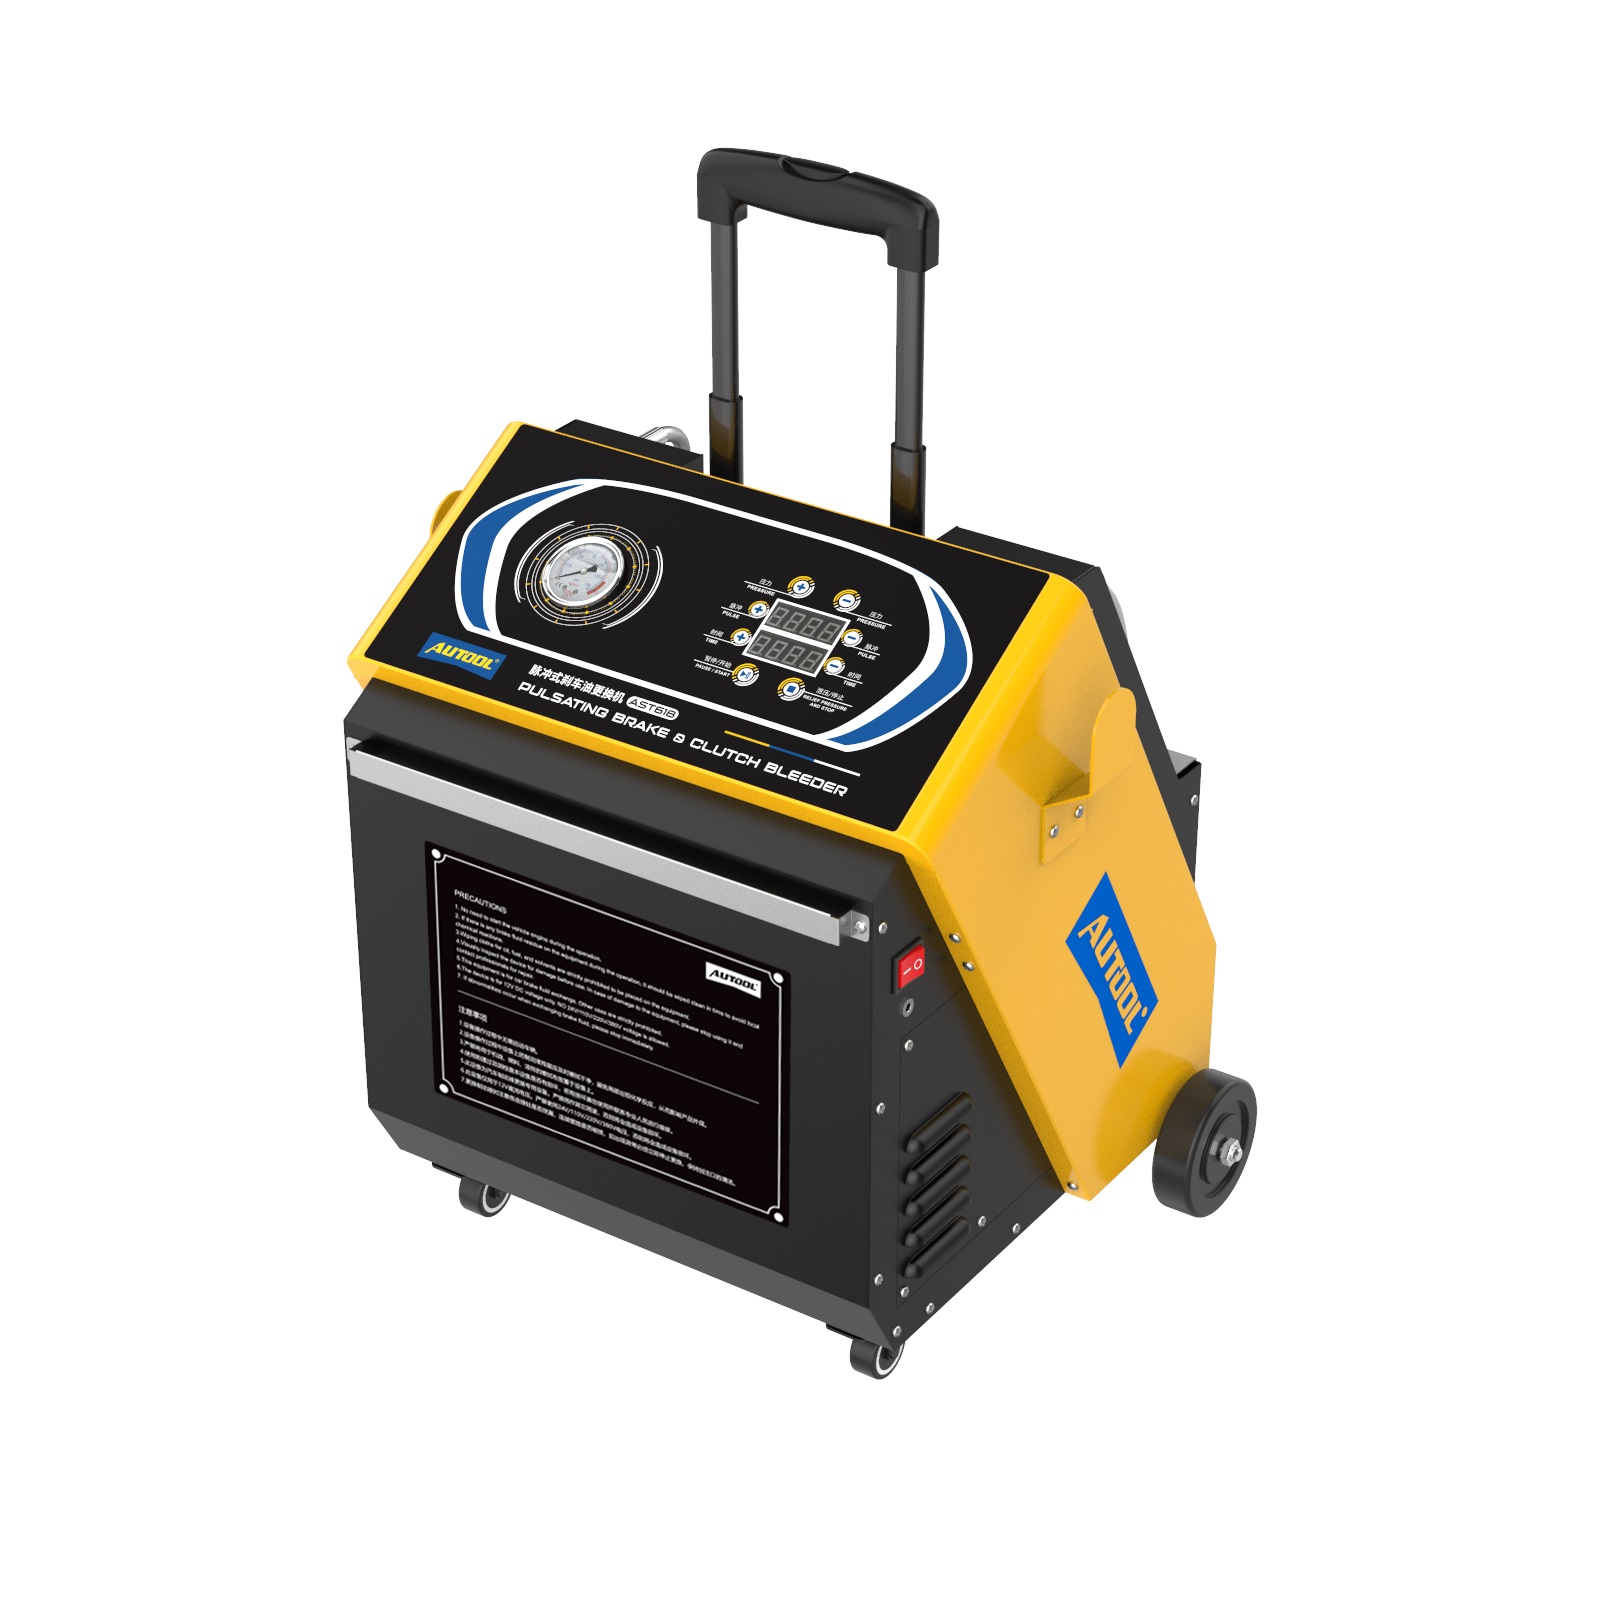
AUTOOL AST618 Pulsating Brake Fluid Exchanger Four-Wheel Oil Change
₹82,600.00
Reviews
There are no reviews yet.